
Chapter 2: Data Management, Symbols, and Styles in QGIS
Part II C: Reusing Layer Styles
After we have customized our layer’s symbology and labels, there are a few ways in which we can reuse this styling. Reusing styles is useful for a couple of reasons. First, when we add a shapefile to QGIS, it will not show any symbology; we have to spend time designing its symbology. So, reusing our symbology allows us to quickly symbolize a newly added layer without having to spend time in the layer’s Properties menu. Second, a key point of cartography is honesty in presentation of map data. Cartographers strive to present their map data as honestly and accurately as possible. By reusing styles across a series of maps, a cartographer can provide the necessary consistency for telling an honest story with his or her maps.
For example, let’s say that we not only had a shapefile containing forestry data for PEI for 1935 but also shapefiles containing forestry data for PEI in 1955, 1975, and 1995. Provided that the shapefiles were all polygons and all had exactly the same headers in their attribute tables, we could apply the same Graduated symbology style we created for the 1935 layer to the others. All of the layers would thus have the same class breaks and colour scheme, making for easy and accurate comparisons across each of the time points. As a bonus, we could also copy our labels to the other layers.
Copying a Style
Since we do not have the hypothetical forestry layers mentioned above, let’s say that you would like to copy the styling that we created for the 1935 inventory region layer in this chapter’s project file to the same layer in Chapter 1’s project file. To quickly do so:
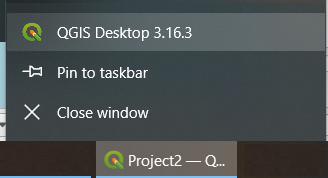
- Make sure that both projects are open. That is, make sure that you have two different windows of QGIS open, one with Chapter 1’s project file and one with Chapter 2’s project file.
- On Windows, one good way to open two instances of QGIS is to have one QGIS window open, right-click the QGIS button in the Taskbar, and then click QGIS Desktop. A second instance of QGIS will open, and you can click Project and then Open to open another project, such as Project1.
- On a Mac, it is more difficult to have two projects open at once. However, you can still copy a layer and then open a different project (note that this will close your other project) and paste that layer into the Layers panel.
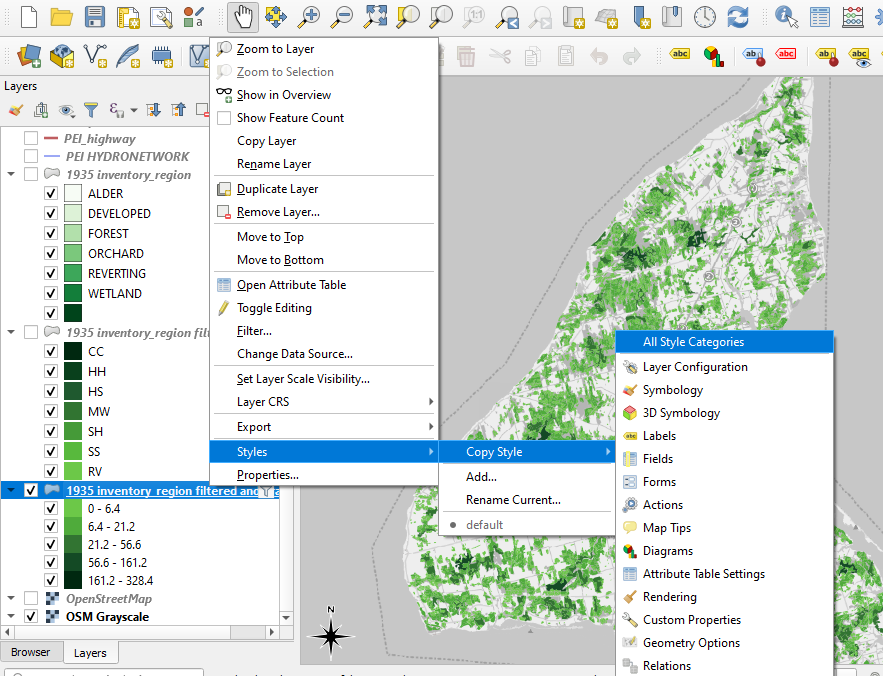
- In the QGIS window containing the project that features the layer whose style you would like to copy, right-click this layer and click Styles, and then Copy Styles, and then All Style Categories.
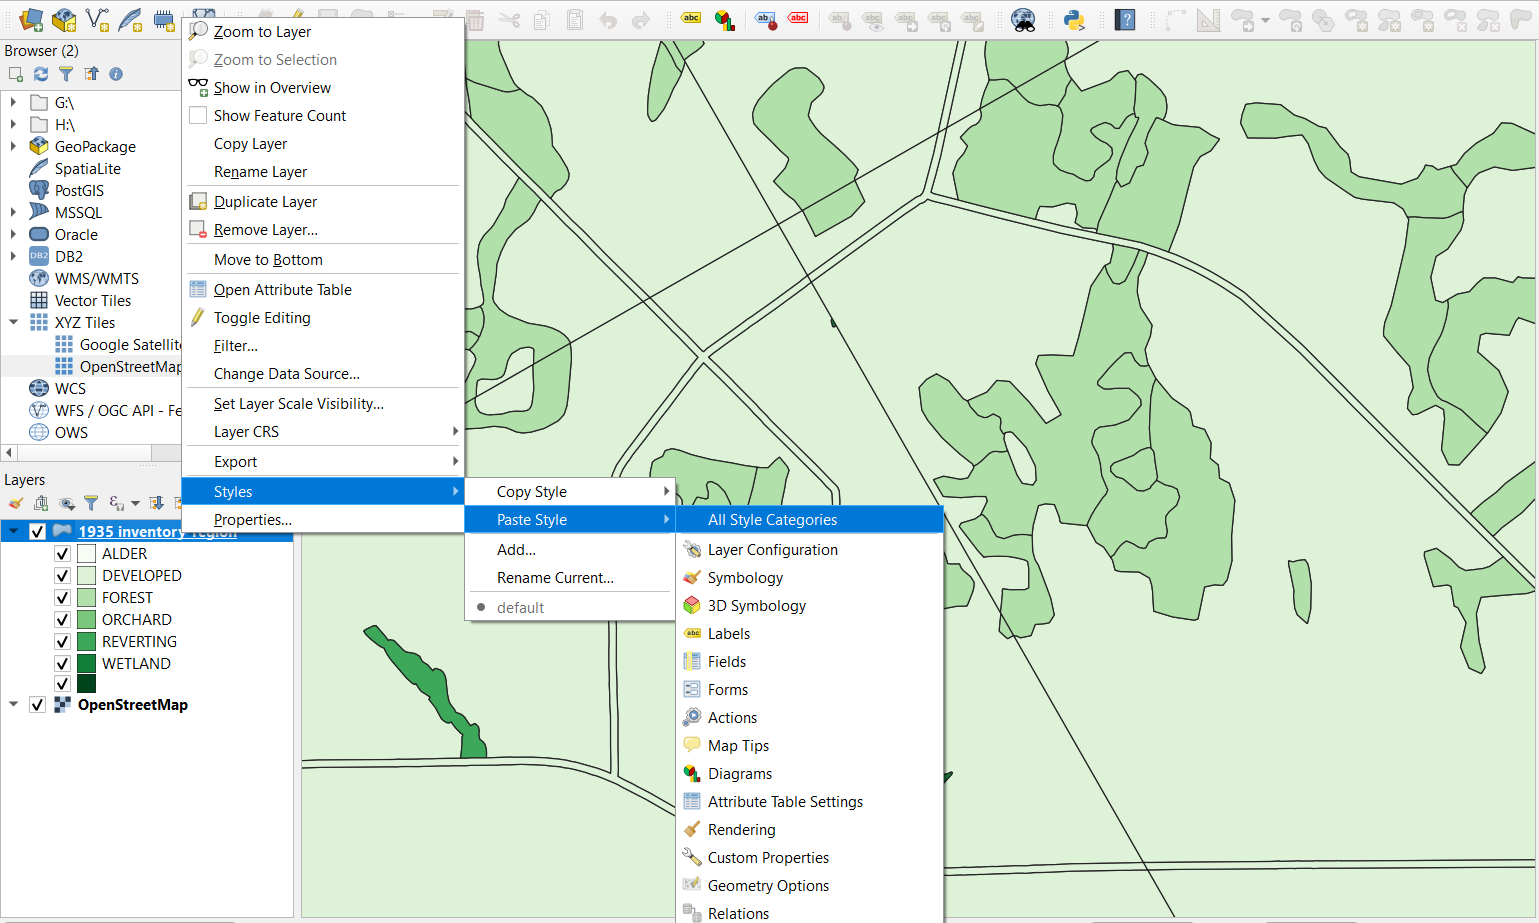
- In the QGIS window containing the project that features the layer onto which you would like to copy the style, right-click this layer and click Styles, and then Paste Style, and then All Style Categories.
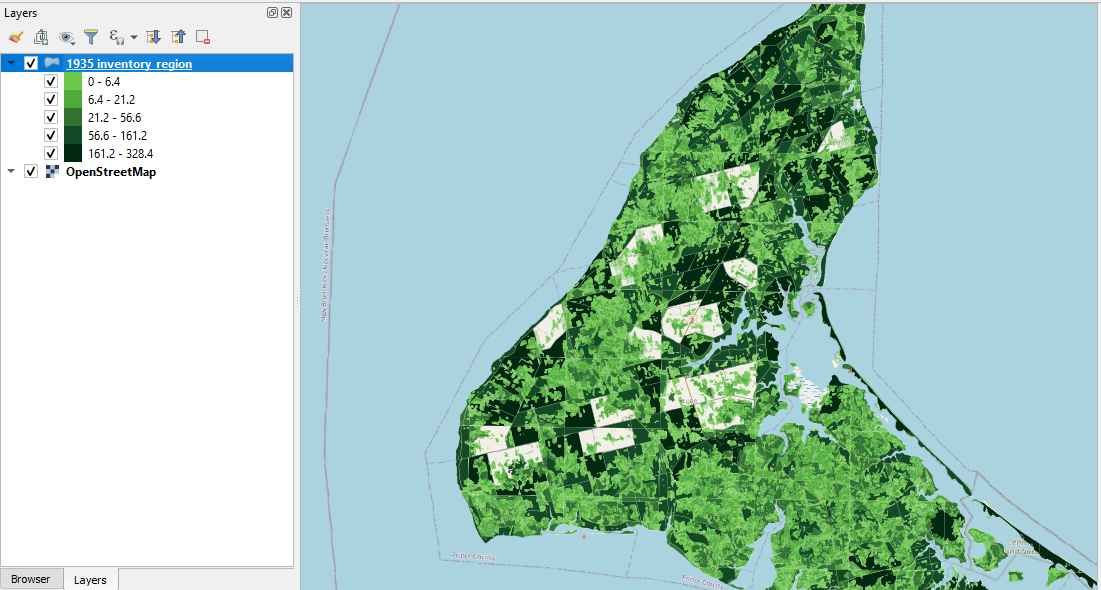
Here is the result of the paste:
Saving a Style
The process outlined above for copying a style is effective for times when you only need to copy a style once and quickly paste it onto another layer. However, if you wish to save your style permanently, you have a few options.
Saving a QGIS Style File (.qml)
A QGIS Style File (.qml) offers much of the same functionality as the process of copying and pasting symbology, but it allows you to permanently save this symbology instead of temporarily storing it on your clipboard. It also allows you to have a layer’s symbology load automatically when the layer is added to a project.
To save a QGIS Style File:
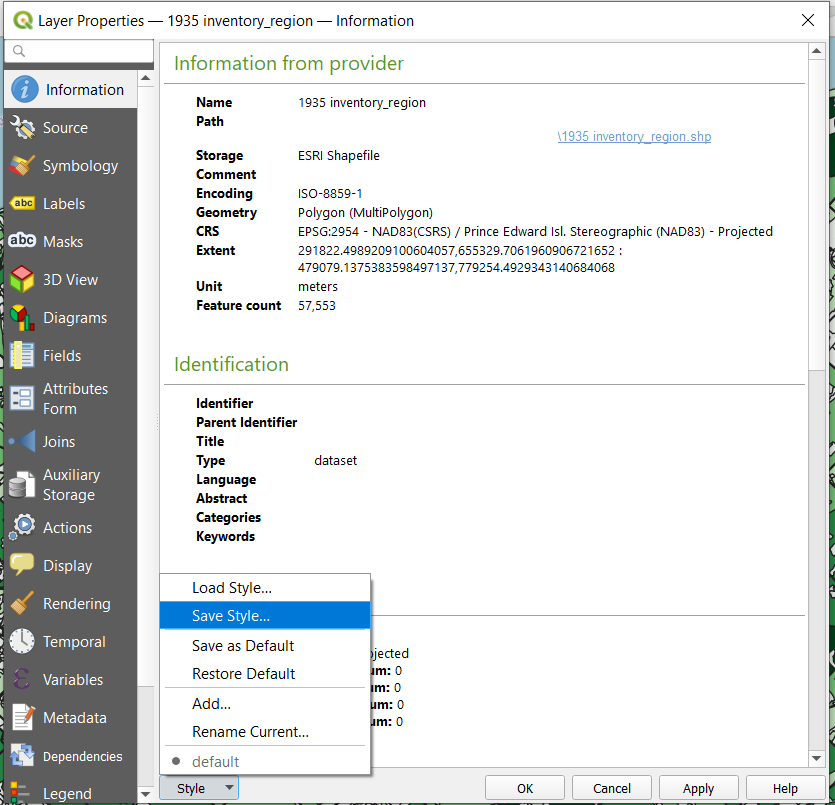
- In the table of contents, right-click the layer whose style you would like to save.
- Click Properties…
- Click Information.
- At the bottom of the Information window, click Style and then Save Style…
- Click Browse
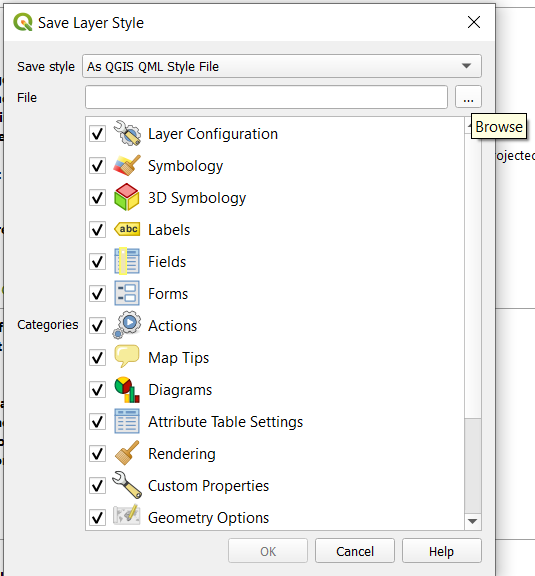
- Navigate to the folder in which the layer from which we are saving the style (i.e., the original layer) is stored. In this case, navigate to the folder called Project1\Data\forest_35.SHP.
- If you need a reminder as to its location, check the “Path” field in the Information window.
- Next to File name, type in the name of the shapefile associated with this style file. We want the original shapefile and the QGIS Style File to have the same name.
- Although the two files will have the same name, their extensions will differ. The shapefile will be called 1935 inventory_region.shp while its corresponding QGIS Style File will have the name 1935 inventory_region.qml.
- Click Save
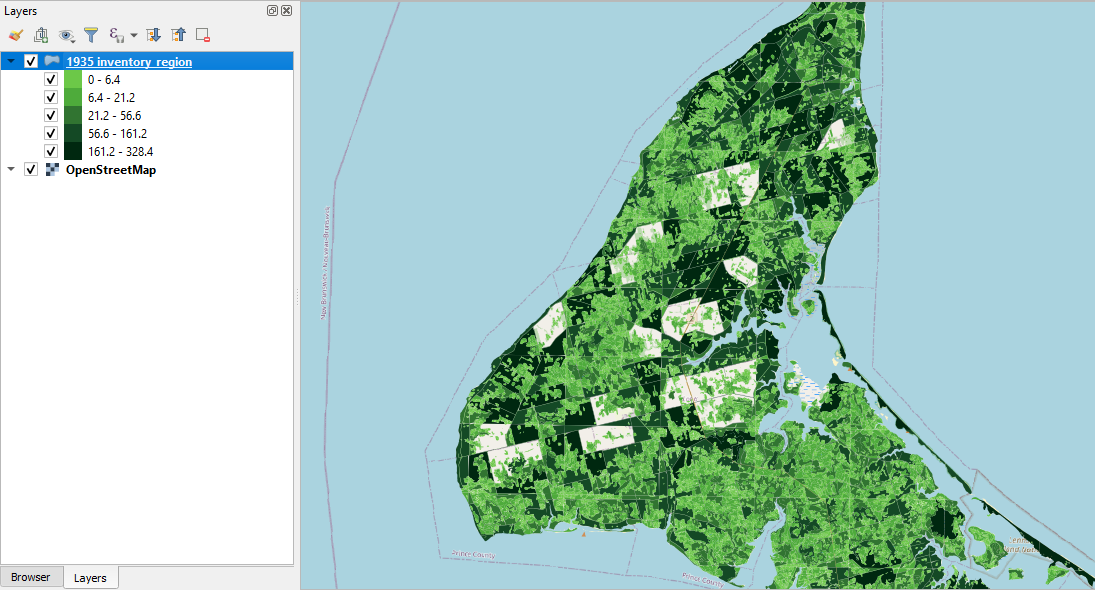
If you open a new project and add the 1935 inventory_region shapefile from the forest_35.SHP folder, it will be automatically symbolized according to the settings stored in the QGIS Style File that we just saved. This is done automatically because the shapefile and QGIS Style Files were stored in the same folder and were given the same name.
Here, we added the shapefile from the forest_35.SHP folder, and QGIS automatically loaded the corresponding QGIS Style File.
If you do not save a shapefile and its corresponding QGIS Style File in the same location, QGIS will not automatically symbolize the shapefile. However, you can manually apply the QGIS Style File to the shapefile.
- In the table of contents, right-click the layer to which you would like to apply the symbology.
- Click Properties
- Click Information
- At the bottom of the window, click Load Style…
- Click Browse
- Navigate to the location where you saved your QGIS Style File and double-click it.
- Click Load Style
Saving a QGIS Layer Definition File (.qlr)
If you would like to create a new file that includes the shapefile and its symbolization, you can export the styled shapefile as a QGIS Layer Definition File (.qlr). When you add this file to a project, its style settings will automatically appear.
The key difference between a QGIS Layer Definition File and a QGIS Style File is that you can only use a Style File in conjunction with its corresponding shapefile. On the other hand, a Layer Definition File contains both the shapefile and its symbolization settings. QGIS treats it as a map layer unto itself.
To save a QGIS Layer Definition File,
- In the table of contents, right-click the layer whose style you would like to save into a new QGIS Layer Definition File.
- Click Export
- Click Save as Layer Definition File…
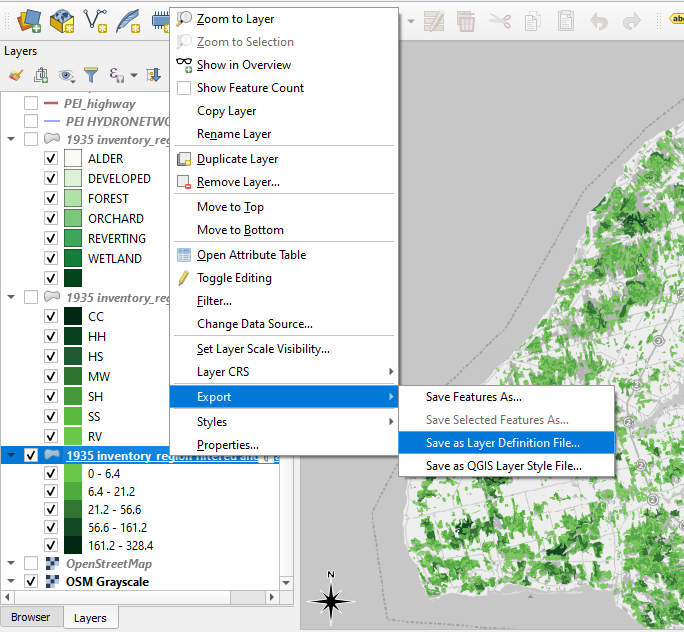
- Save the file in an appropriate location, perhaps in a folder alongside any other data you are using for a project.
To load a QGIS Layer Definition File,
- Using the Browser pane, navigate to the location where you saved your QGIS Layer Definition File.
- Double-click the QGIS Layer Definition File to load it into your project.
Here, we saved the 1935 inventory region shapefile that we symbolized earlier in the chapter as a QGIS Layer Definition File and then loaded it into a new, blank project. Note that the symbolization settings and our filter have been retained without having to replicate them manually.
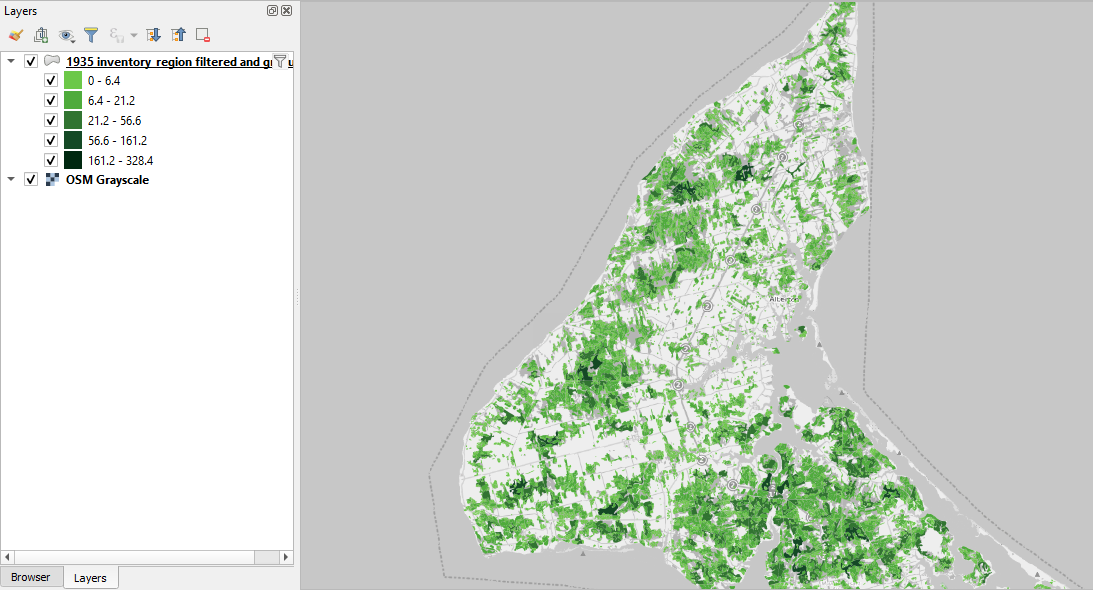
Note also that the QGIS Layer Definition File has the same attributes as the original shapefile from which it was created. You can verify this by opening the QGIS Layer Definition File’s attribute table.
Watch for a future chapter on Creating and Sharing a GeoPackage for information on how to save styles within a GeoPackage.